A new storage location is created during adding a chemical to your inventory. You can easily manage and keep organized lab by creating them along with your needs. The most common locations are "flammables", "fridge", "freezer", "acids", "base", "shelf A" etc. Please check the list of your "storage locations" before creating a new one to avoid multiple "shelf A" etc.
Creating a Storage Location
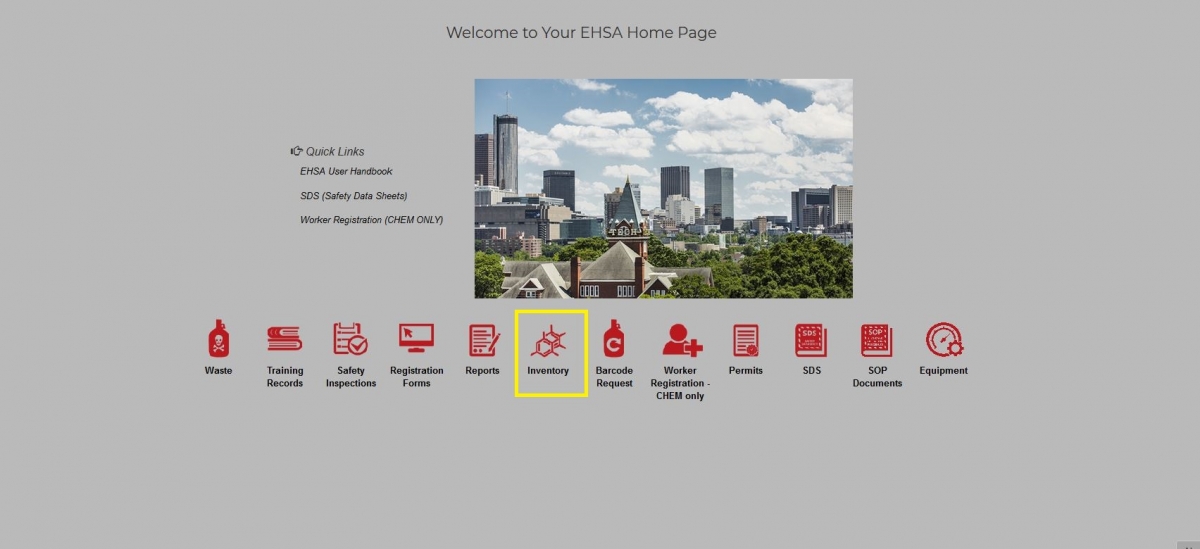
- Click on “Inventory” icon
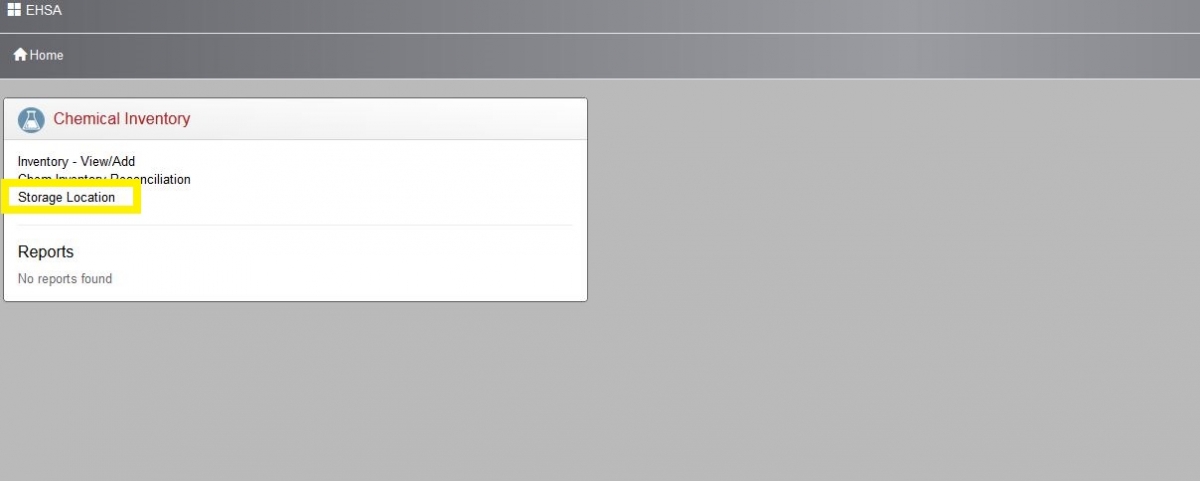
- At the "Chemical Inventory" box, click on “Storage Location”
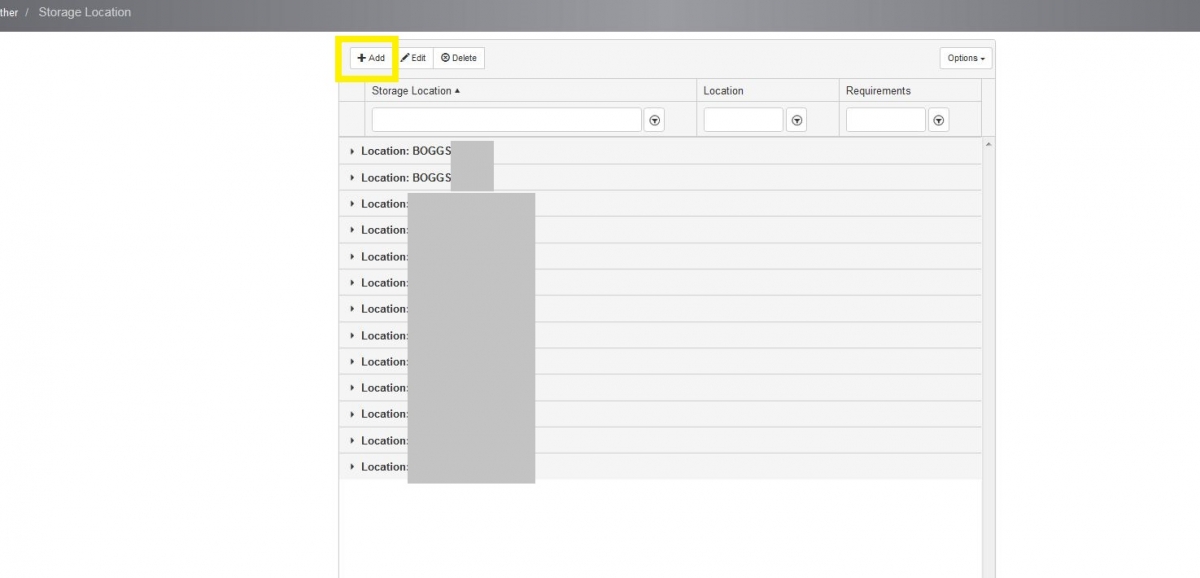
- Click on "+Add" icon (left top corner), a new screen will pop out
- Fill out all information highlighted with a red asterisk.

- Click on "Save"

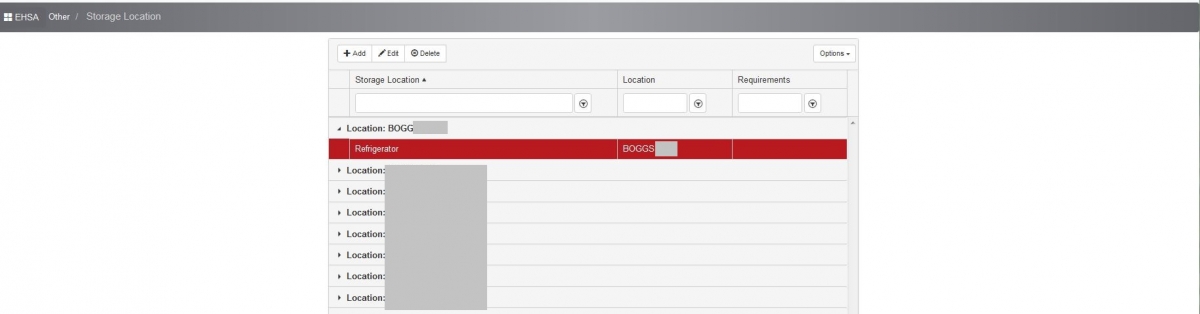
- Click on "►" next to your lab location to see a full list of your storage locations

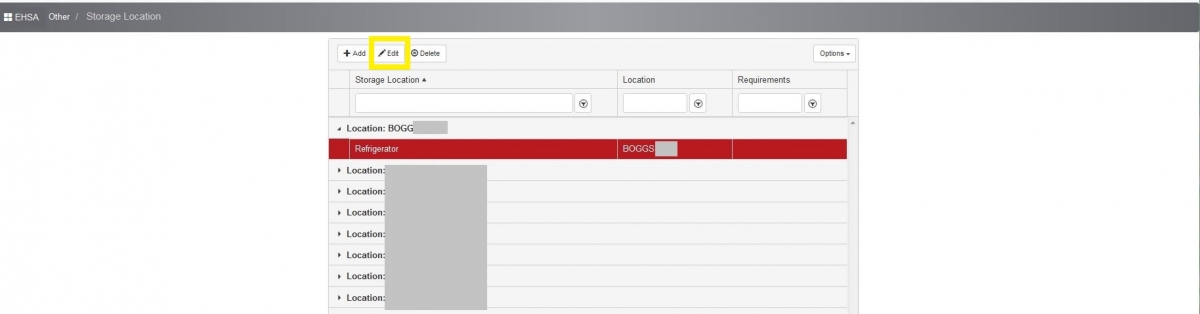
Editing Storage Location
- Click on “Inventory” icon
- At the "Chemical Inventory" box, click on “Storage Location”.
- Highlight your storage location which you would like to edit by a one mouse click (red highlight)
- Click on "Edit" icon (left top corner), a new screen will pop out
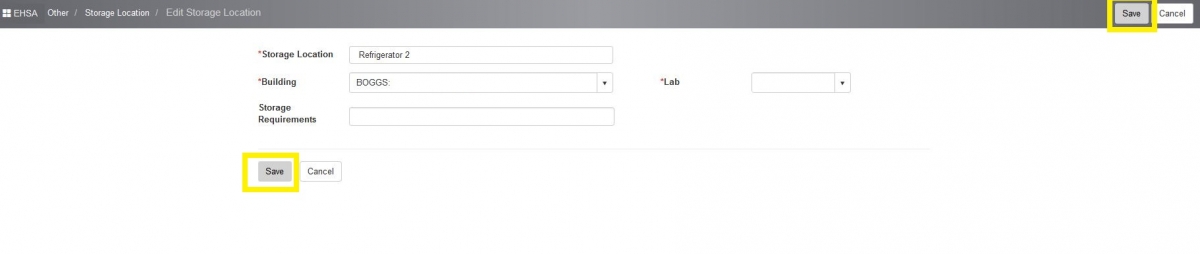
- Fill out all information highlighted with a red asterisk.
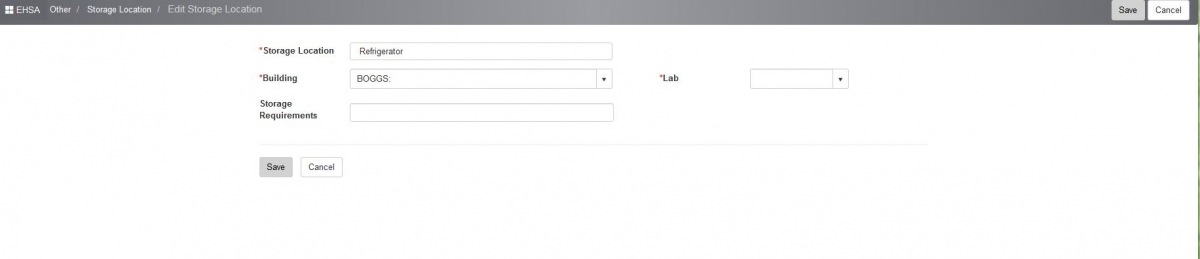
- Click on "Save"
- Click on "►" next to your lab location to see a full updated list of your storage locations

.