Scanned Items:
Attention Required (Yellow Highlight)
These items are probably scanned at the different location than originally entered to the EHSA system or may belong to a different PI. Addressing the Attention Required item is done by updating/correcting a PI, location and/or storage location. To address the issue origin, check where the small check box appears (in which column; PI, location etc.). Below, there is an example of how to address the location issue.
EXAMPLE: Current location means the location where they were entered to the system. Scanned location means a location where the items were scanned (physically scanned at the moment of reconciling your lab).
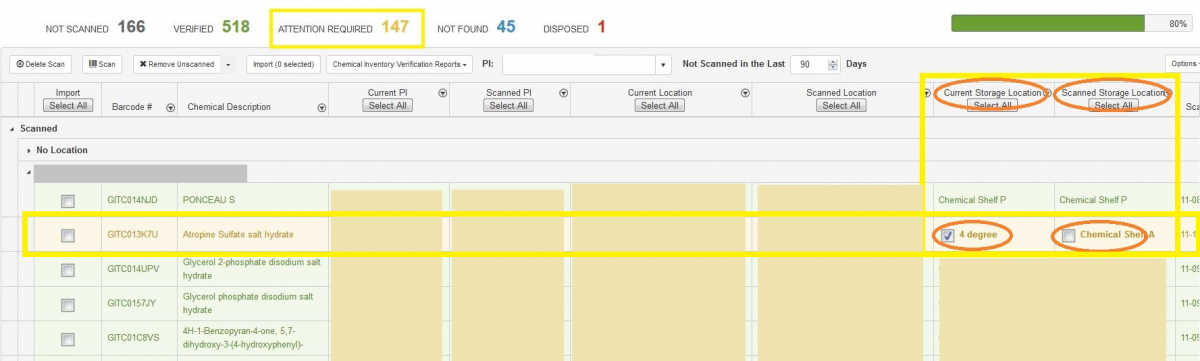
You can move physically an item to the location where it’s listed in the system (current location) and check the box on the “current location”. If you decide the “scanned location” is the location where this should be, check the box in the scanned location. Remember about importing the updated/corrected item after addressing the item.
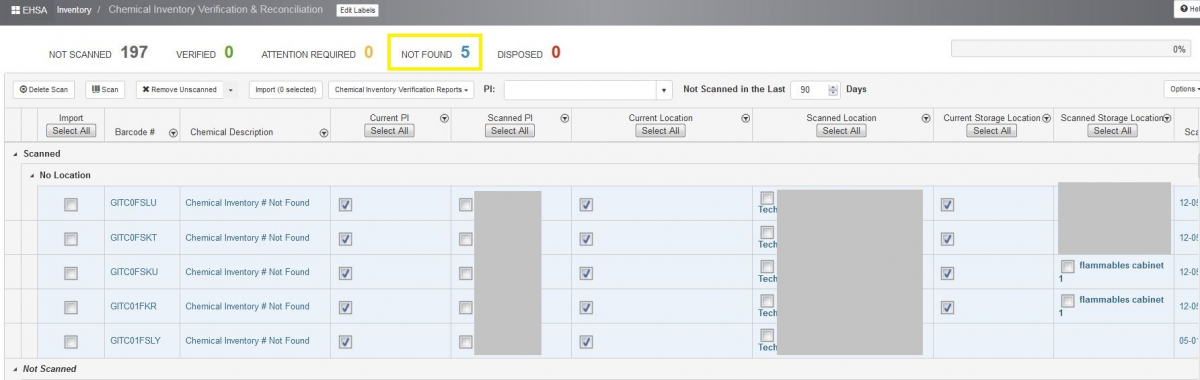
Not Found (Blue Highlight)
The Not Found chemicals are not found in your chemical inventory. They might be not entered to the system OR your scanner did not read the barcode properly (partial barcodes due to fast scanning; please give a second for each scan at least), OR your scanner read the vendor barcode (all GT barcode are the 10 digits barcode, starting from “GITC” and followed by a 6 digits unique barcode).
- Highlight the problematic entry and use the “Delete Scan” button.
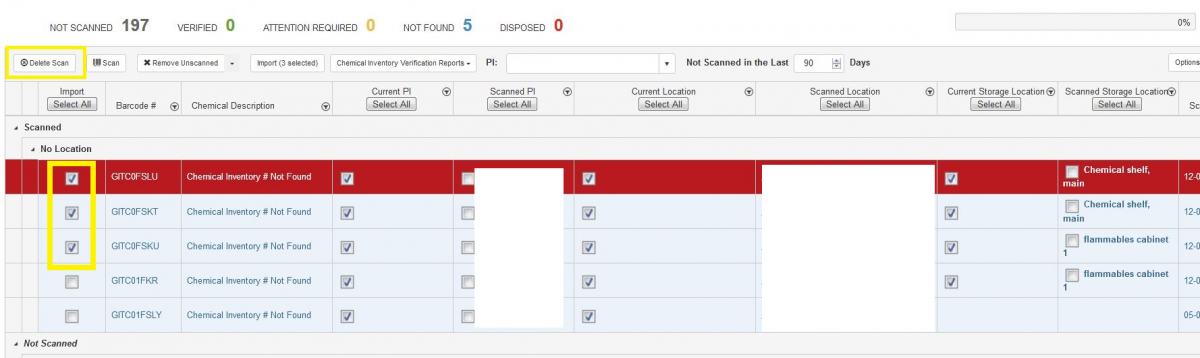
- Click “Yes” to confirm removing the item.

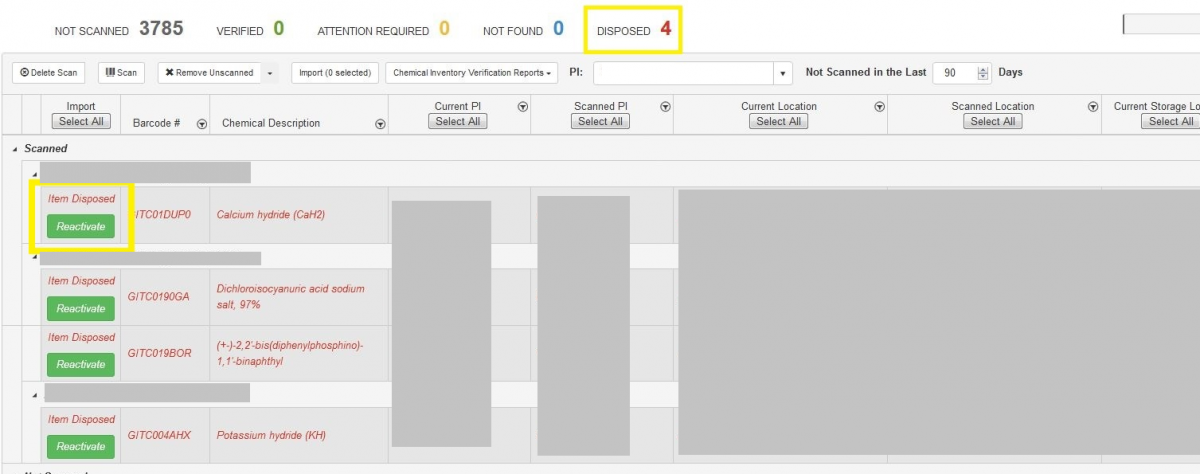
Disposed (Grey Highlight, Red Font)
You can reactivate the found chemicals during scanning, originally marked as disposed. Click “Reactivate” button to reactivate the chemical in your inventory and confirm by clicking “Yes” in a pop up box.
Not Scanned Items
If you scanned all items in the lab and you believe the unscanned items were disposed in the past but your Group inventory was not updated at that time, highlight the unscanned item, click “Remove Unscanned” button. A pop up box appears, choose the reason of removal and click “submit”. You can highlight multiple unscanned items at once. After a pop box appears, a new column “Select for Removal” appears on the left side. Choose items to remove. You will notice the red counter in the “Remove Unscanned Items" box.
NOTE: If you find the disposed chemical in the future, you can reactivate that item in the inventory table (Inventory – “View/Add”, check “Managing a Chemical Status of your Chemical”) or reactivate at next reconciliation (see above the Disposed section). If you still have a problem with reactivating, contact EHS to help you and your Group.